
The ULTIMATE 10-day Philippines Island-Hopping Itinerary
Planning a Philippines island-hopping itinerary sounds dreamy, until you realise you’re staring down 7,641 islands with no idea where to start.
There are way too many options and just not enough time, and one wrong choice could mean spending half your trip on buses instead of beaches. Trust me, I’ve been there before!
After a couple of trips to the Philippines and more island research than I care to admit, I’ve built what I genuinely believe is the perfect 10-day island-hopping itinerary.
An itinerary that balances paradise beaches, off-the-beaten-track gems, and just enough adventure to keep things interesting.
Whether you’re a solo female traveller or simply someone who wants to make every single day count, this guide is for you.
By the end of this post, you’ll know exactly which islands to visit, how to get between them, where to stay, and what not to miss, covering Darocotan Island, El Nido, Coron, and the magical Siquijor.
Let’s get into it!
Disclaimer: This post contains affiliate links. If you decide to make a verified purchase through the links in this post I will earn a small commission. This will be at no extra cost to you. Thank you.
My Philippines Travel Essentials
✈️Flights and Transport: I always search for the cheapest flights using Skyscanner. You’re guaranteed to find the best prices here. For overland transport I recommend using 12goasia and bookaway.com.
🛏️Accommodation: Make sure to check out different sites like Booking.com and Hotels.com to book your accommodation! If you’re on a budget, then make sure to check out Hostelworld.
🎟️Activities: I always book my tours through Get Your Guide and Viator so make sure to check them out as I’m sure they’ll have the perfect tour for you.
🦋Insurance: Make sure you’re covered against any incidents during your trip. I’ve used SafetyWing multiple times for standard travel and World Nomads for adventure travel/activities. I can’t recommend them enough!
📱Download an eSIM: Avoid roaming fees, and have peace of mind that you have internet access when WiFi isn’t available…I recommended downloading SIMs from Sim Local – They are the most affordable around!
About this Philippines island-hopping itinerary
This Philippines backpacking route is based on the exact trips I’ve taken myself that have been refined across a couple of visits to make sure it’s as good as I can possibly make it.
I designed it with solo female travellers in mind, but honestly? It works brilliantly for anyone who wants to see the best of the Philippines without spending half their trip on a ferry or a bus.
My goal for this itinerary was nice and simple… make sure it had the perfect balance of stunning beaches, off-the-beaten-track gems, and just enough adventure to keep things interesting.
I had the best time following this exact itinerary, and I’m almost 100% sure you will too!
Here’s a quick snapshot of your 10 days in the Philippines:
| Days | Destination | Highlight |
| Days 1–3 | Darocotan Island | Secret island paradise, snorkelling, total relaxation |
| Days 3–5 | El Nido, Palawan | Lagoons, limestone cliffs, epic island hopping |
| Days 5–7 | Coron | World-class diving, lakes & wreck snorkelling |
| Days 7–10 | Siquijor | Waterfalls, witchcraft & the most beautiful sunsets |
How to get to El Nido, Palawan
This 10-day Philippines island-hopping itinerary starts in El Nido on the beautiful Island of Palawan.
Most international flights to the Philippines will first land at Manila Ninoy Aquino International Airport (MNL). From Manila, you have two options for getting to El Nido on the island of Palawan:
Option 1 — Fly direct into El Nido Airport (ENI). The most convenient option, but also the priciest. Expect to pay between $85–$150 for a direct flight from Manila to El Nido, depending on the season. The flight itself is only around 1 hour and 20 minutes, so it’s well worth it if your budget allows.
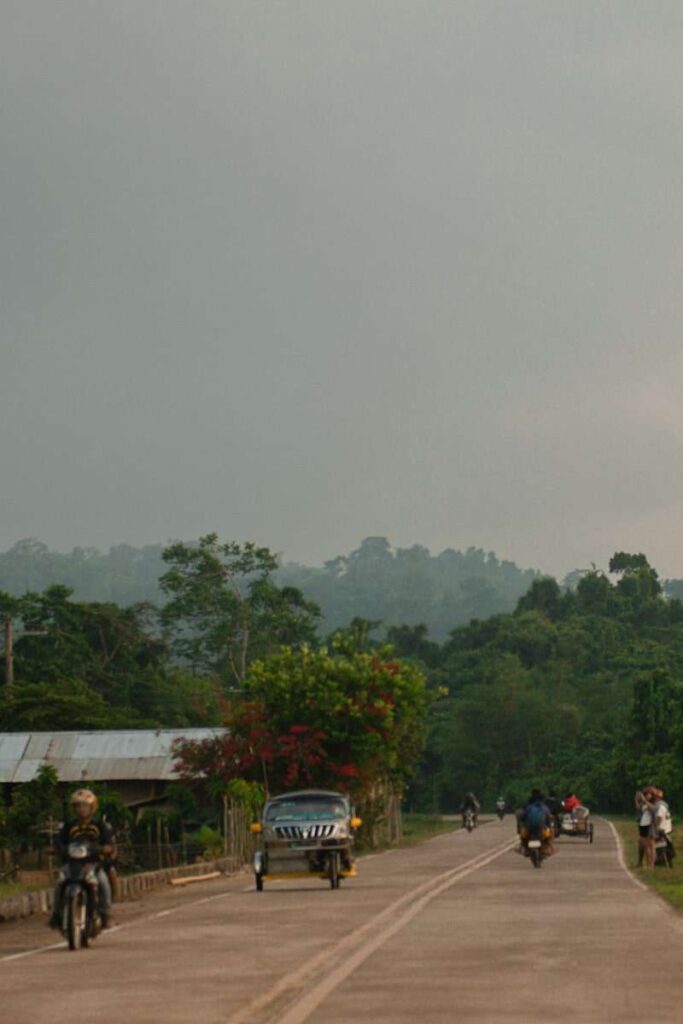
Option 2 — Fly into Puerto Princesa (PPS) + take a shuttle. This is the budget-friendly alternative. Flights from Manila to Puerto Princesa are significantly cheaper and run far more frequently. From Puerto Princesa, you can book a shuttle bus directly to El Nido.
The journey takes around 5–6 hours, depending on stops, and buses start from around $20 per person. This is the option I went with, and it was fairly seamless (albeit the shuttle bus isn’t the most comfortable for a short 5ft 5 woman like me, let alone someone tall).
If you’re tight on time, factor in that this option will eat up most of a travel day. If you have the flexibility, though, it’s a perfectly comfortable journey and a great way to see a bit of Palawan en route.
⭐ Best time to visit the Philippines — The best time for island hopping in the Philippines is between November and May during the dry season. Try to avoid June–October if possible, as this falls within typhoon season.
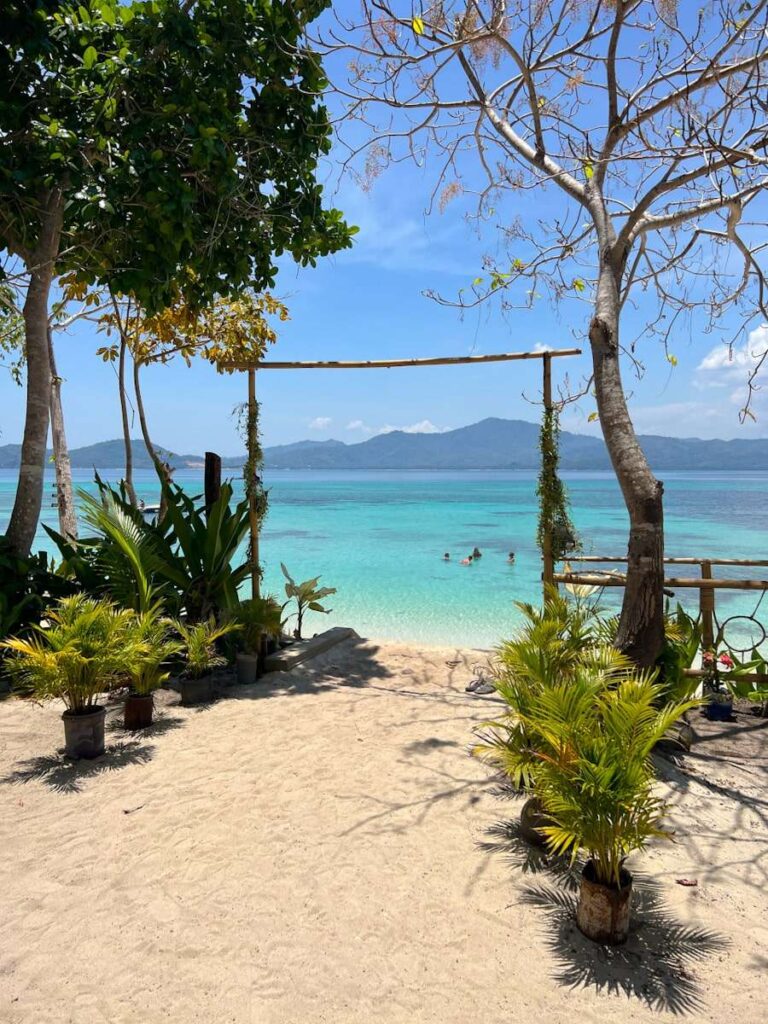
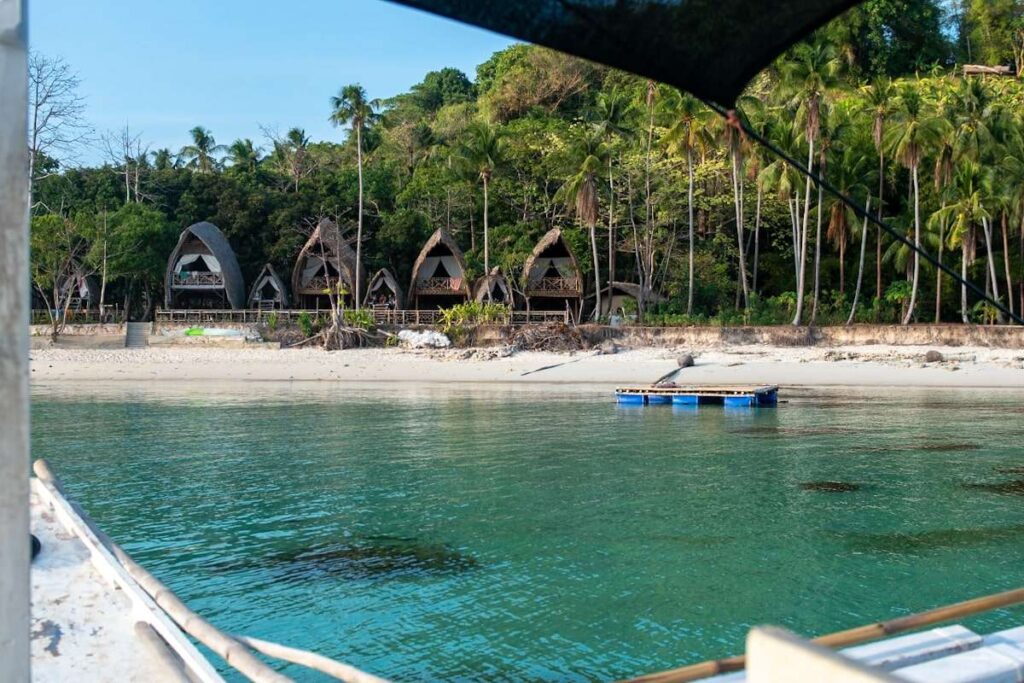
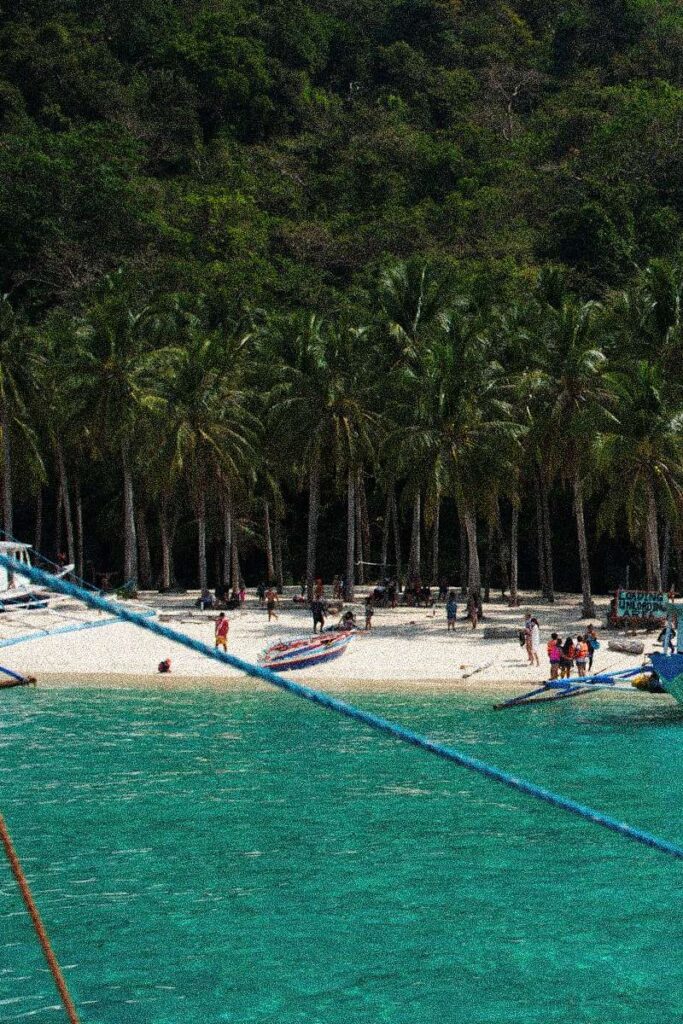
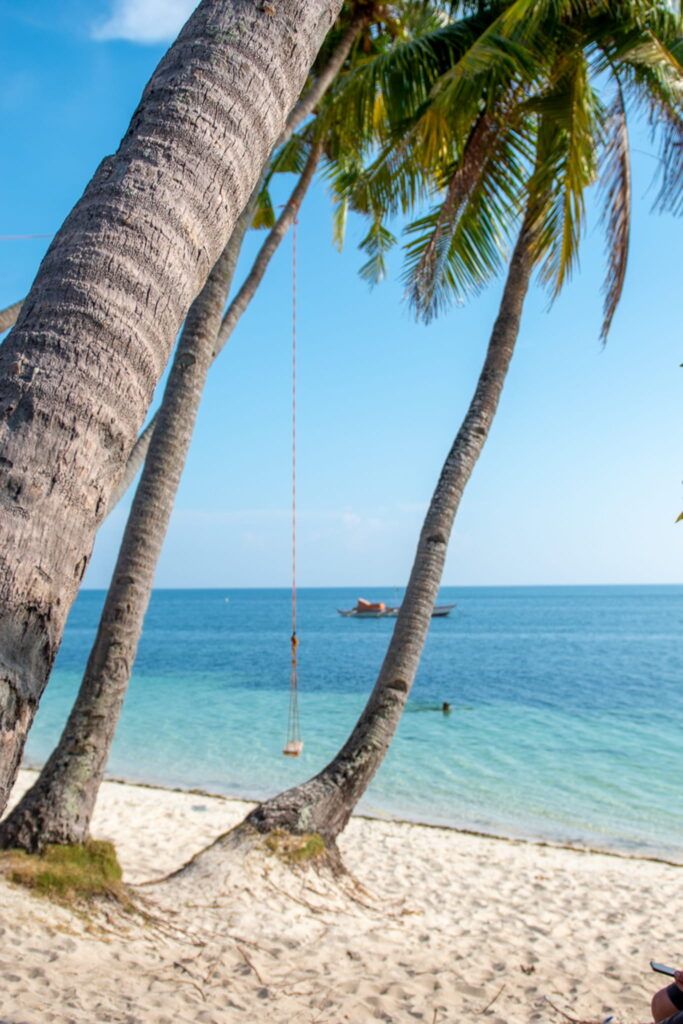
Days 1–3 — Darocotan Island
If you’ve never heard of Darocotan Island, you’re not alone (and that’s exactly what makes it so special).
It’s a small, quiet island about an hour from El Nido town, where you’ll find no beach clubs, just a couple of guesthouse-style hotels and genuinely beautiful scenery and a nice, slow pace of life.
If you’ve just landed after a long-haul flight, this is exactly the kind of place you want to start your trip, and it’s now quickly become one of my favourite parts in the Philippines.
How to get to Darocotan Island
Getting to Darocotan Island is straightforward once you know the drill.
From El Nido, you’ll need to make your way to Teneguiban Port, which is roughly a 50-minute journey. You have a few options for getting there:
- Moped rental is the most flexible way to get there, and gives you the freedom to stop off along the way if anything catches your eye.
- Private taxi is the easiest option if you have a lot of luggage or simply want a hassle-free journey.
- Shared shuttle is the most budget-friendly choice and can be booked directly through Isla- The Island Experience when you make your accommodation reservation (more on this accommodation below).
I chose to book the shared shuttle option as it was the most straightforward option. Once at the port, you can jump on the free boat over to the island. Boats run at the following times:
| Departure | Time |
| Trip 1 | 10:00am |
| Trip 2 | 12:00pm |
| Trip 3 | 2:00pm |
| Trip 4 | 5:00pm |
Where to stay in Darocotan Island
There are three main accommodation options on the island:
- Isla – The Island Experience ⭐ — My top pick for everyone. It strikes the perfect balance between affordable comfort and a real sense of community. Rooms start from around $35–$50 per night, depending on the season. The communal vibe here makes it incredibly easy to meet other travellers (brilliant if you’re heading out solo).
- Dryft Darocotan — A more upscale option if you’re looking for a bit more privacy and luxury.
- Richcoast Darocotan El Nido — The most budget-friendly choice on the island.
🛏️🏝️Thinking about staying at Isla Experience? Read my full honest review before you book. And if you want to know more about exactly what to expect on Darocotan, you can read my guide here.
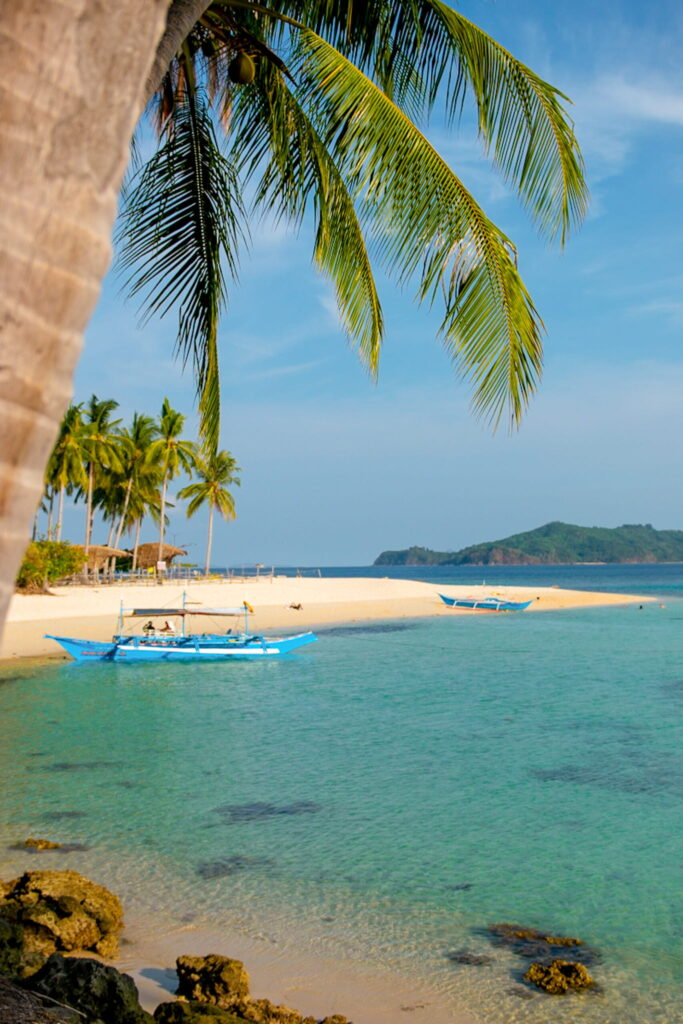
What to do on Darocotan Island
Let’s be honest, the main activity here is doing as little as possible, and that’s completely fine.
But if you do want to get active, here’s what’s on offer:
- Snorkelling — The reef around Darocotan is stunning and teeming with marine life. Guests of Isla Experience can borrow snorkel gear completely free of charge.
- Paddleboarding — Rent a paddleboard for the day for just $5/250 PHP. Gliding across that flat, clear water on a calm morning is genuinely one of the highlights of this whole itinerary.
- Beach hopping — The island has several small beaches worth exploring on foot.
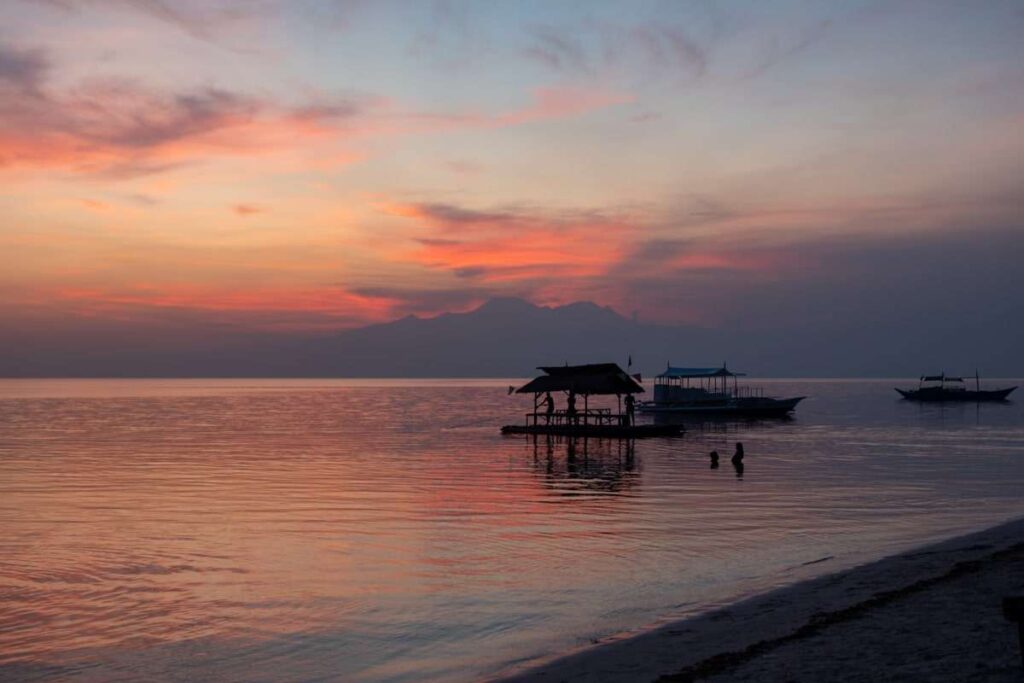
- Sunset watching — Darocotan sunsets are something else. Find a spot on the beach around 5:30 pm and watch the sky turn colours of pink and orange.
My favourite thing to do at Darocatan was sunbathe on their floating pontoon, which is located just a few metres from the shore!
Other Things To Know Before You Visit Darocotan Island
Food
Meals at Darocotan Island are served on-site at Isla Experience in a communal dining style. think long tables, good food, and conversation with other travellers.
For me, this was one of the unexpected highlights of my trip that made the whole experience feel more like staying with friends than a hotel. We all got to sit at a long table, having a good old chat and giggle whilst sharing our travel stories.
WiFi
There is WiFi on the island, but don’t expect to be scrolling Instagram all day, as the connection is patchy at best. Honestly though? I loved getting the chance to fully recharge and disconnect. Make sure to download anything you need before you arrive and embrace the digital detox.
Safety
Darocotan Island is a very small, safe, and welcoming island, which makes it perfect for solo female travellers. The community feel of Isla Experience means you’re never far from other guests, and the staff are incredibly friendly and attentive.
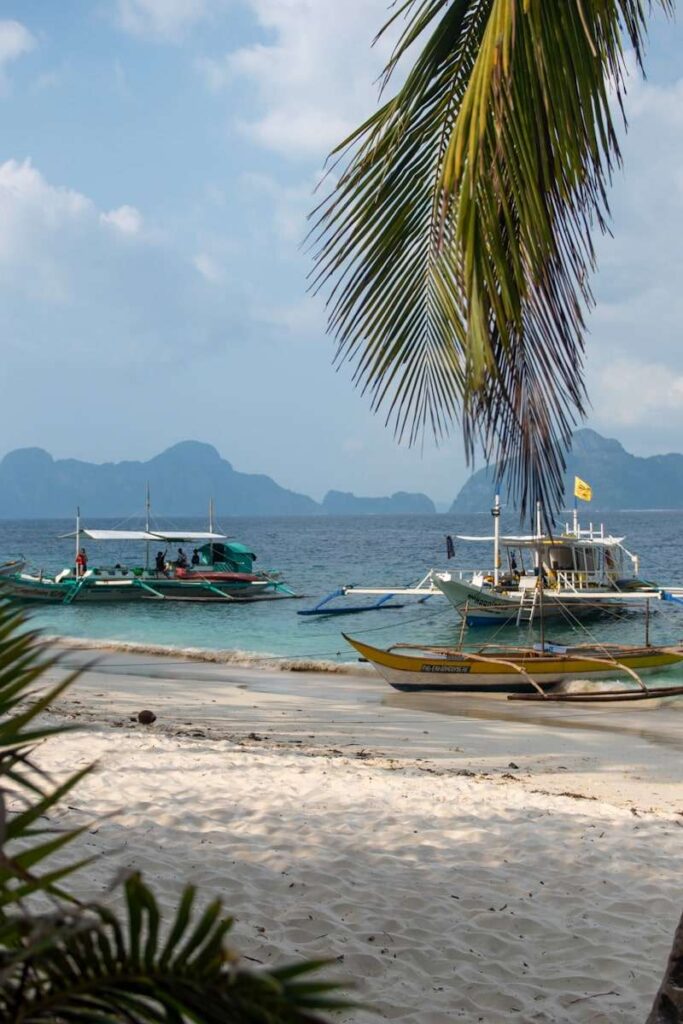
Days 3–5 — El Nido, Palawan: Lagoons, Cliffs & Island Hopping
After the peace and quiet of Darocotan, El Nido is a bit of a reality check.
It’s busy, quite touristy, and the town itself can feel a little chaotic. But once you get out on the water and start exploring the nearby islands, all of that completely melts away.
I’ve visited El Nido twice now, and whilst the town centre isn’t exactly a hidden gem, the surrounding islands and lagoons are genuinely breathtaking.
Getting from Darocotan Island to El Nido
Getting back to El Nido from Darocotan is nice and straightforward. Catch one of the following boats back to Teneguiban Port:
| Departure | Time |
| Trip 1 | 9:00am |
| Trip 2 | 11:00am |
| Trip 3 | 13:30pm |
| Trip 4 | 16:00pm |
From there, you can take your private taxi or shuttle bus back to El Nido (this can be arranged through your accommodation).
Where to stay in El Nido
I’d strongly recommend staying in El Nido town centre rather than further out. Being central means you’re walking distance from the best bars, restaurants, and most importantly, the port, which will make your early morning island-hopping boat trip departure much less stressful!
Here are my top picks:
- Frendz Hostel — If you’re travelling solo and want to meet people, this is the one. It has one of the best views in El Nido, a brilliant social atmosphere, and is one of the best party hostels in town. I didn’t stay here, but I did make use of the rooftop bar! Prices start from $20 per night
- SANSE Boutique Hotel — If you’d prefer something quieter and more private, SANSE is a beautiful option and surprisingly affordable for what you get. Prices start from $100 per night.

What to do in El Nido
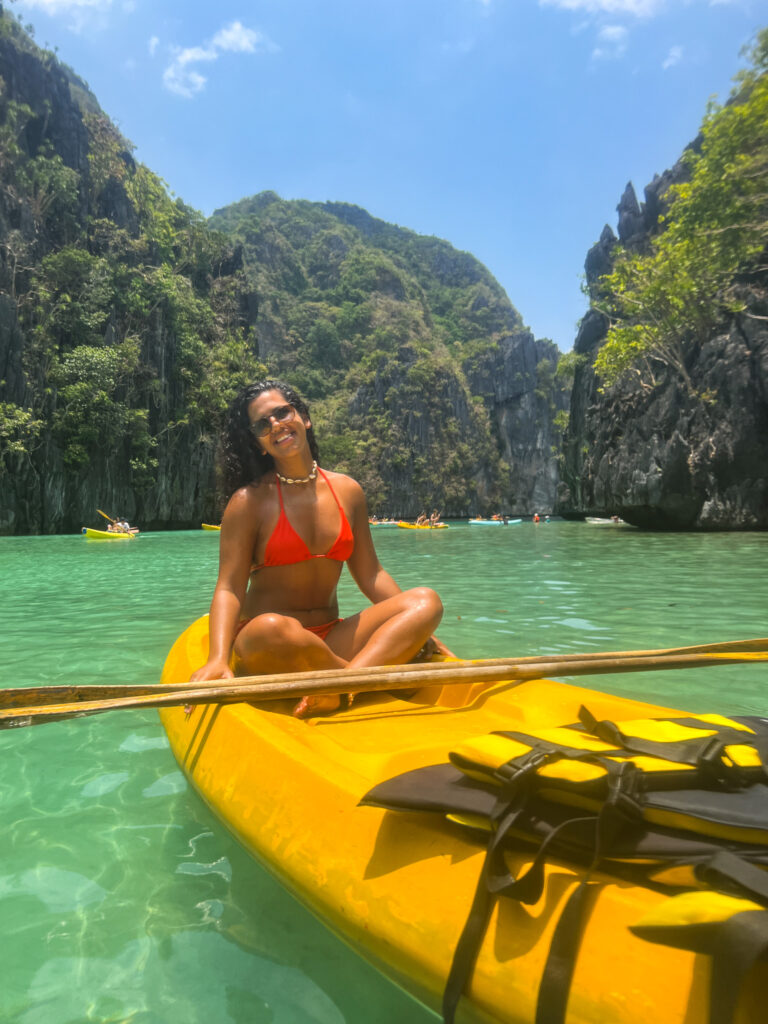
Island Hopping
Island hopping is without question the highlight of any El Nido itinerary, and I cannot recommend it highly enough.
There are two main tours available, Tour A and Tour C, each taking you to a completely different set of islands and beaches.
We did Tour A, and it was one of my favourite days in the entire Philippines. You can pay a little extra to kayak through them, which I’d absolutely recommend doing.
For the best experience, I’d book with Haqqy Life. They’re part of the Frendz Hostel operation, but they welcome all travellers, not just backpackers.
Tours start from around $28/1,390 PHP, and the guides are brilliant and so much fun! This trip was one of my favourite things to do in El Nido, and it’s definitely not to be missed!
It’s also good to note that Haqqy Life also runs a jeep and waterfalls tour if you fancy a break from the beach.
⚠️ NOTE: Make sure you book your tour in advance during peak season (December–April). Spots fill up fast, and you don’t want to miss out.
Nacpan Beach
If you have a free afternoon, Nacpan Beach is well worth the trip. It’s a sweeping 4km stretch of golden sand lined with palm trees.
Getting there from El Nido town is easy. It’s roughly a 24-minute journey, and you can either grab a taxi or rent a moped if you fancy the scenic ride up yourself. We’d recommend the moped if you’re feeling adventurous (the drive is actually really beautiful).
We spent a lazy afternoon here on our second visit, and it was the perfect way to wind down after a couple of days of island hopping. Make sure to grab a fresh coconut, find a spot, and don’t move for a few hours.
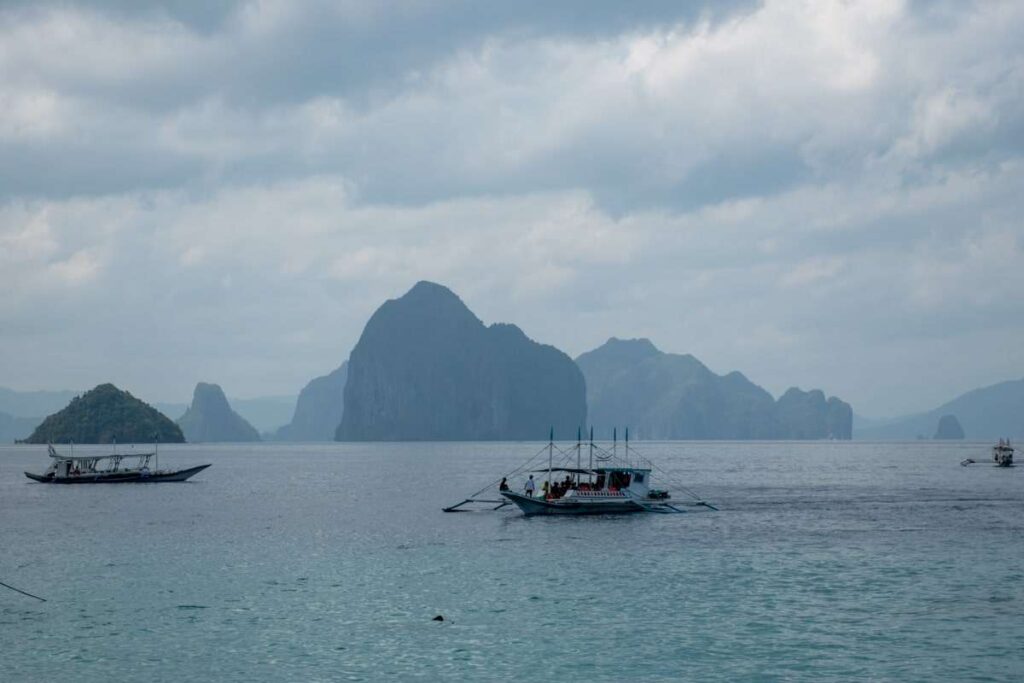
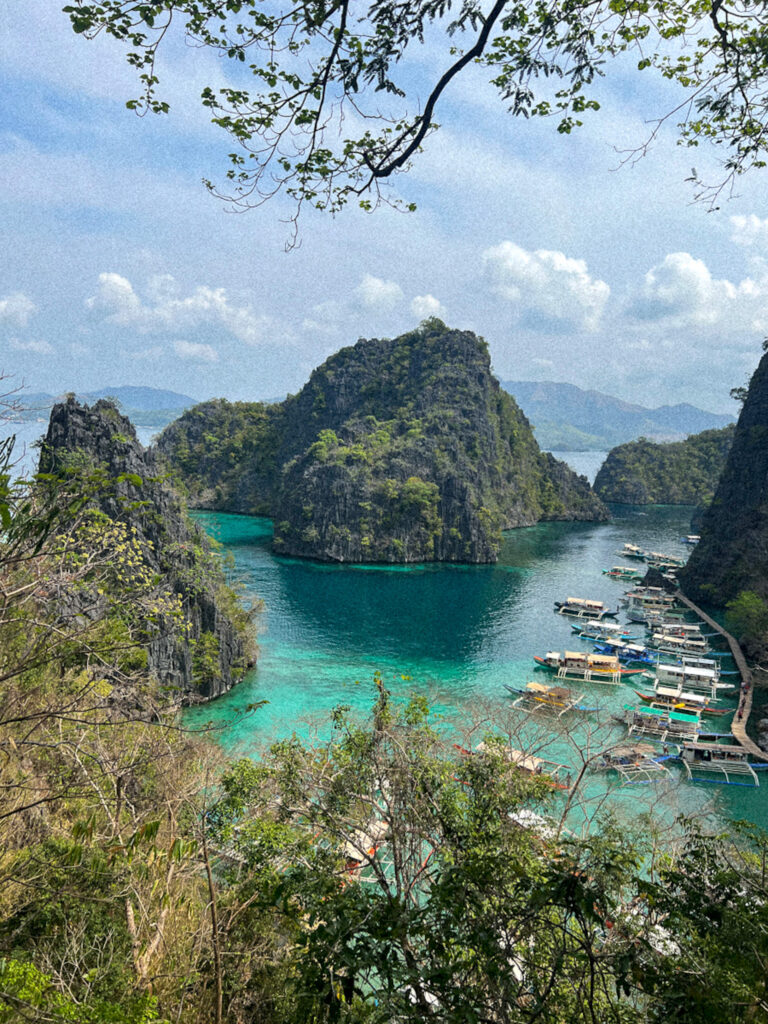
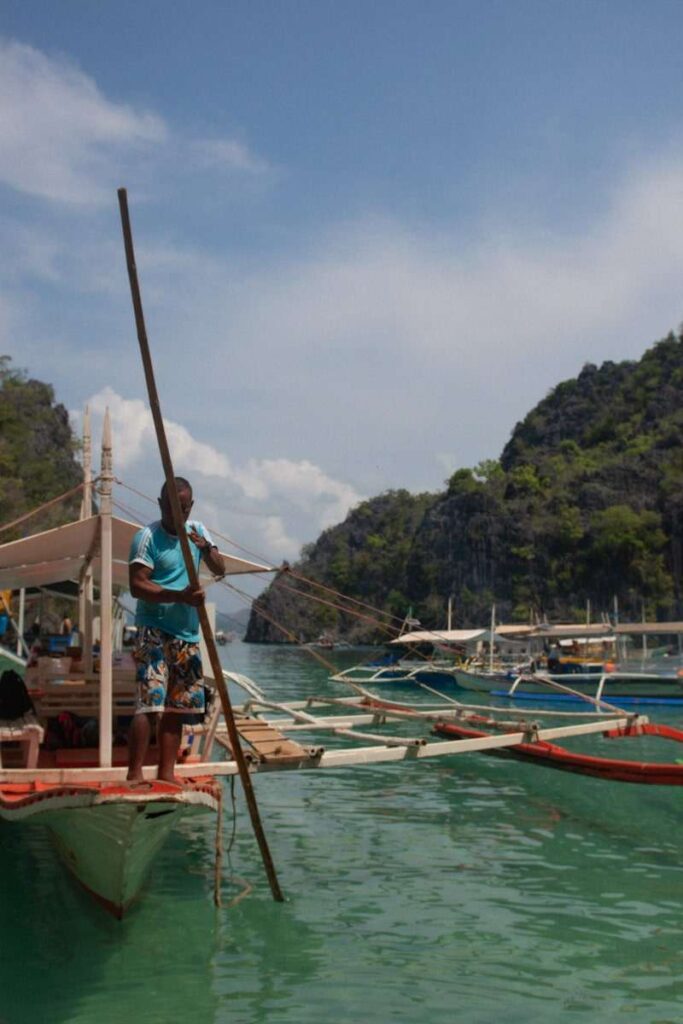
Days 5–7 — Coron: Lakes, Lagoons & World Class Diving
Coron was a place I knew very little about before I visited, but it really surprised me in the best way!
It has a completely different feel from El Nido. The landscape here is dramatic and raw, and here you can find hidden lakes and some of the best wreck diving in the world. If diving is on your radar, this is the place to do it.
Getting from El Nido to Coron
There are two ways to make this journey — by plane or by ferry.
By plane — There are direct flights from El Nido to Busuanga Airport in Coron. It’s only a 40-minute flight, but it does come at a price, typically upwards of $88/4,000 PHP. If your budget allows it, though, it’s worth it for the extra time you’ll gain on the island.
By ferry — The El Nido to Coron ferry is the more budget-friendly option. The journey takes around 5 hours and costs approximately $60/3,300 PHP. I took the ferry myself, and if I’m totally honest, it was one of the worst travel days I’ve ever had.
However, that’s probably more to do with the fact I was severely hungover during what was a fairly choppy journey.
Whether you’re hungover or not, make sure you take seasickness medication beforehand if you’re prone to it.

Where to stay in Coron
Coron town has a good range of accommodation options to suit most budgets. Here are my top picks:
- Outpost Hostel — This is super popular with solo travellers. If you’re looking to meet people and swap island-hopping stories over a beer, either of these will do the job nicely.
- Vela Terraces Hotel — If you’d prefer a private room with stunning views and a central location, Vela Terraces is a brilliant option. Great value for what you get.
- Bay Area Lodge — This is where I stayed during my time in Coron, and it was perfectly comfortable for a couple of nights. Rooms start from around $50 per night, making it the most budget-friendly option in town, and it does exactly what you need it to. It’s a clean, convenient base to come back to after a long day on the water.

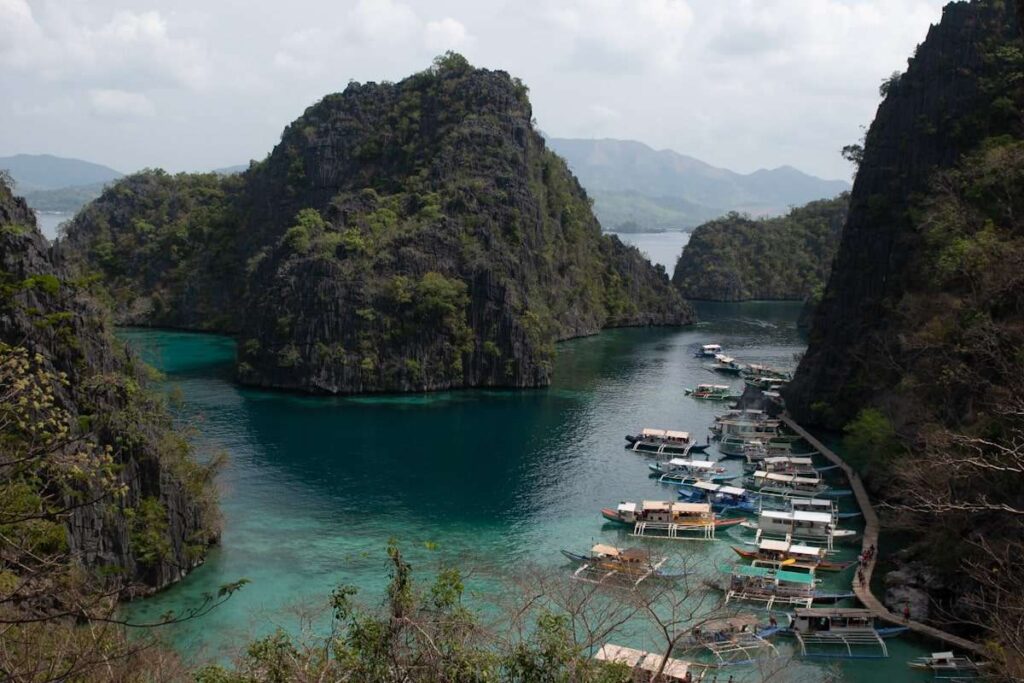
What to do in Coron
Coron Island Hopping Tour
Island hopping is the main event in Coron, and honestly, it deserves every bit of the hype.
The spots you’ll visit here are some of the most jaw-dropping in the entire Philippines and very different to what you’ll have already seen in El Nido.
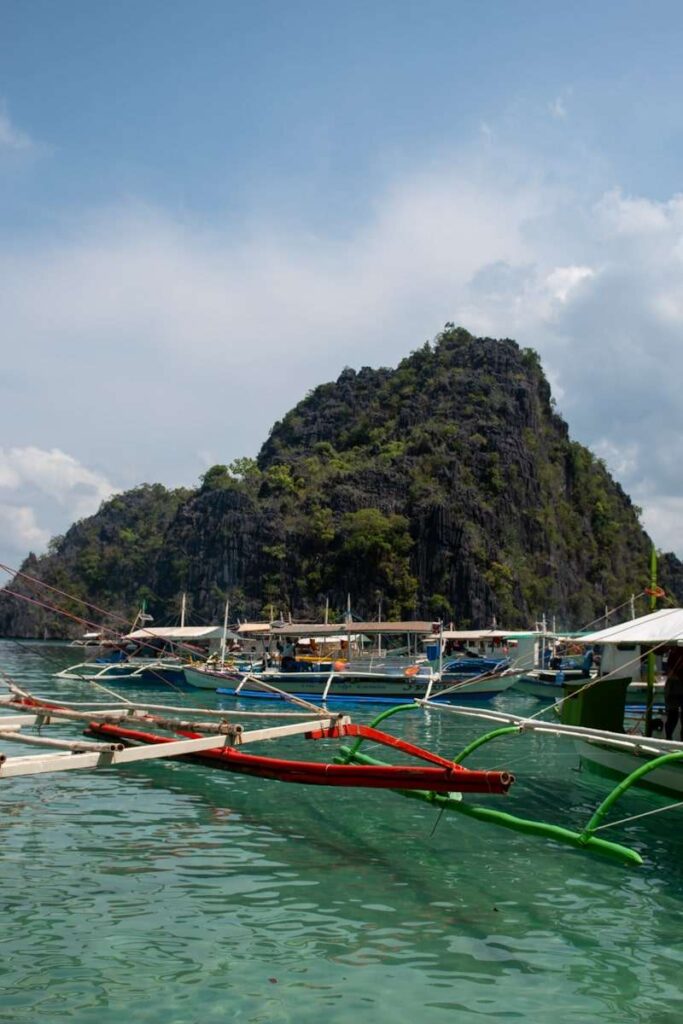
Most tours will take you to a combination of the following:
- Kayangan Lake
- Barracuda Lake
- Twin Lagoon
- Balinsasayaw Beach
- CYC Beach
- Coral Beach
- Siete Pecados
- Skeleton Wreck
- Malwawey Beach
- Ditaytayan Island
- Waling-Waling Island
- Malcapuya Island
No single tour covers all of these (that would be an extremely long day)! Each operator puts together their own combination, so it’s worth reading the itinerary carefully before you book.
⚠️ A word of warning from personal experience, I had a really disappointing experience with the tour operator I chose in Coron (which is why I won’t be recommending the specific one I booked).
The tour came with hidden costs and wasn’t great value at all. Tours typically start from around $40 per person, so if you’re being quoted significantly more than that, shop around.
I’d strongly recommend booking through Get Your Guide or Klook, where you can read verified reviews before committing.
Alternatively, if you’d rather book in person, take your time, read as many reviews as possible, and don’t feel pressured into booking with the first operator you find.
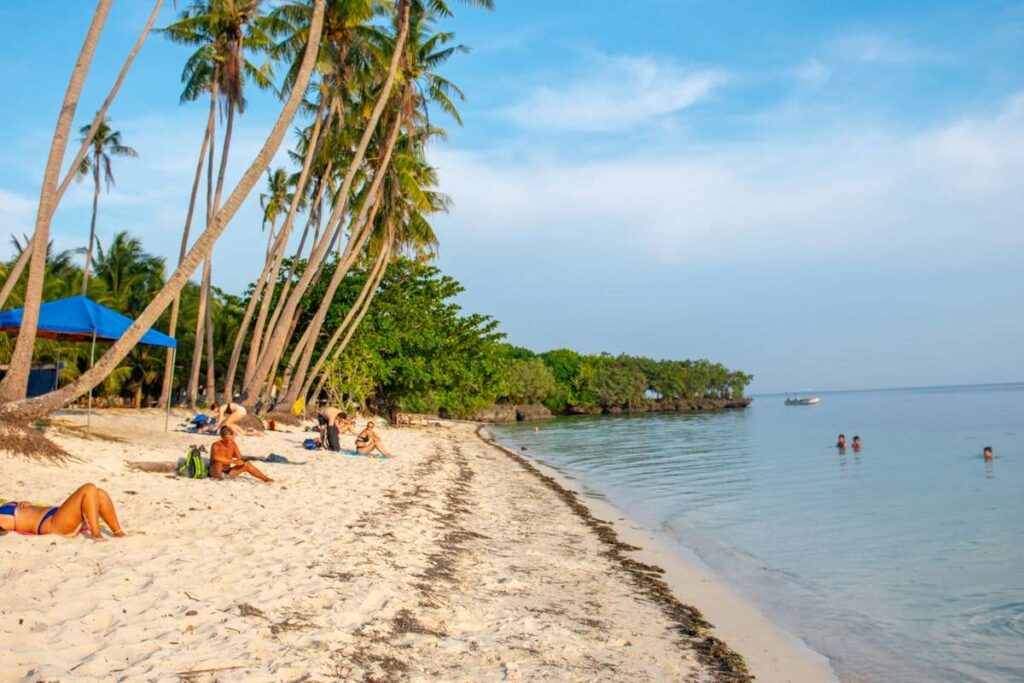
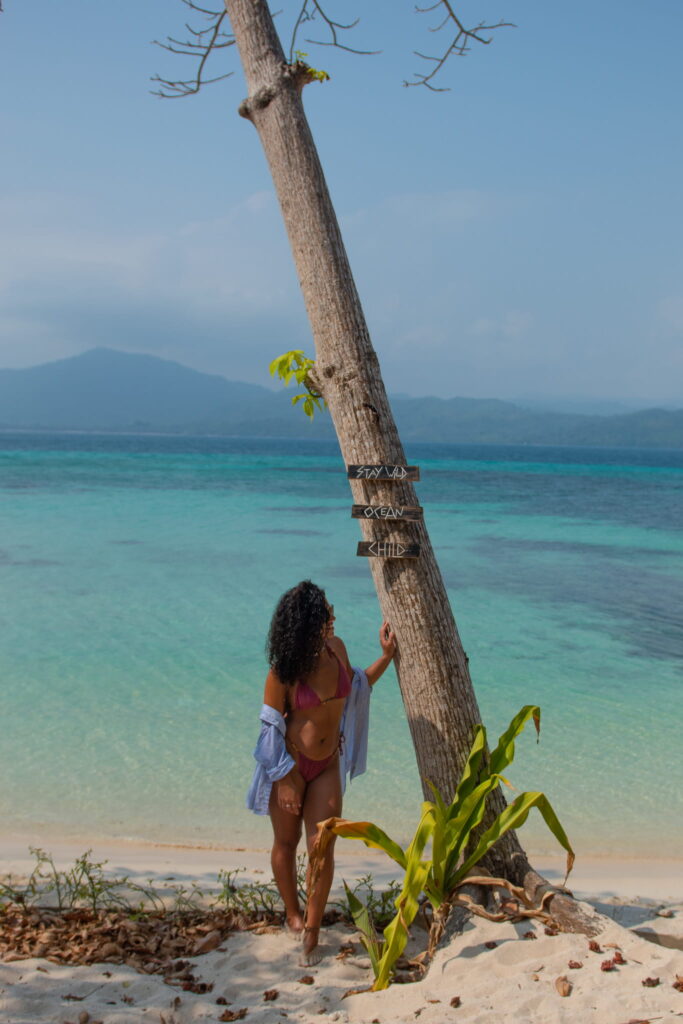
Days 7–10 — Siquijor: The Island That Stole the Show
I’ll just come out and say it, Siquijor was my favourite stop on this entire Philippines island hopping itinerary.
After the tourist buzz of El Nido and Coron, Siquijor felt like a proper exhale. It’s way more relaxed, less touristy, and has this magic to it that’s hard to put into words.
The landscapes blew me away, the people were some of the warmest I encountered in the Philippines (which says a lot because Filipinos are some of the friendliest people in the world), and it still feels beautifully off the beaten track.
And I honestly left this island wondering why more people aren’t talking about it.
Getting from Coron to Siquijor
This is the most logistically involved journey on the whole itinerary, but don’t let that put you off. With a little planning, it’s completely straightforward.
A direct ferry from Coron to Siquijor isn’t a realistic option, unfortunately, the journey takes the best part of two days, which doesn’t work on a 10-day schedule. Instead, you’ll need to combine a short flight with a ferry crossing. You have two options:
Option 1 — Via Dumaguete ⭐ This is the route I took personally and would recommend. Fly from Coron to Dumaguete (expect to pay around $150 for this flight, depending on the season). From there, catch a ferry across to Siquijor, which takes around 50 minutes and is the quicker of the two options overall. You can book your ferry tickets in advance here.
Option 2 — Via Cebu Fly from Coron to Cebu, then take a ferry to Siquijor. The ferry from Cebu takes around 5.5 hours, so factor in a full travel day for this route. You can book your ferry tickets in advance here.
Where to stay in Siquijor
When it comes to choosing where to base yourself in Siquijor, I’d recommend staying in San Juan. It’s centrally located, only a 15-minute drive from the ferry port, and puts you within easy reach of all the best spots on the island.
Here are my top picks:
- Aventura Bed and Breakfast ⭐ — This is where I stayed, and I’d recommend it in a heartbeat. We were lucky enough to stay in one of their super cute treehouses, which made the whole experience even more special (honestly, one of my favourite places I’ve ever slept). Rooms start from just $18 per night, which is an incredible value; the grounds are beautiful, and the staff genuinely go out of their way to make you feel welcome.
- Love Shack Siquijor — I didn’t stay here personally, but it came highly recommended by several solo travellers I met on the road. If you’re after a sociable hostel atmosphere, this seems to be the go-to choice. Check availability here.
What to do in Siquijor
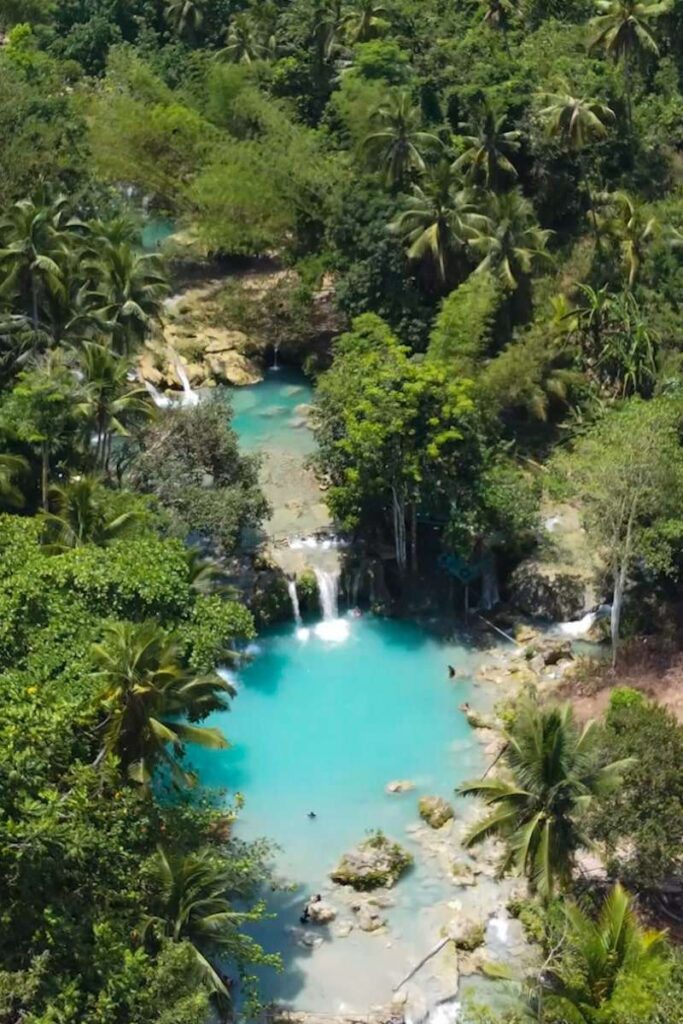
Cambugahay Falls
Cambugahay Falls was personally my favourite experience on the whole island.
It’s a stunning three-tiered waterfall with the most beautiful powder blue water. We got there early to beat the crowds and practically had it to ourselves. If you’re feeling brave, there is a rope swing where you can jump into the water. I was too chicken, but my friend gave it a go and loved it.
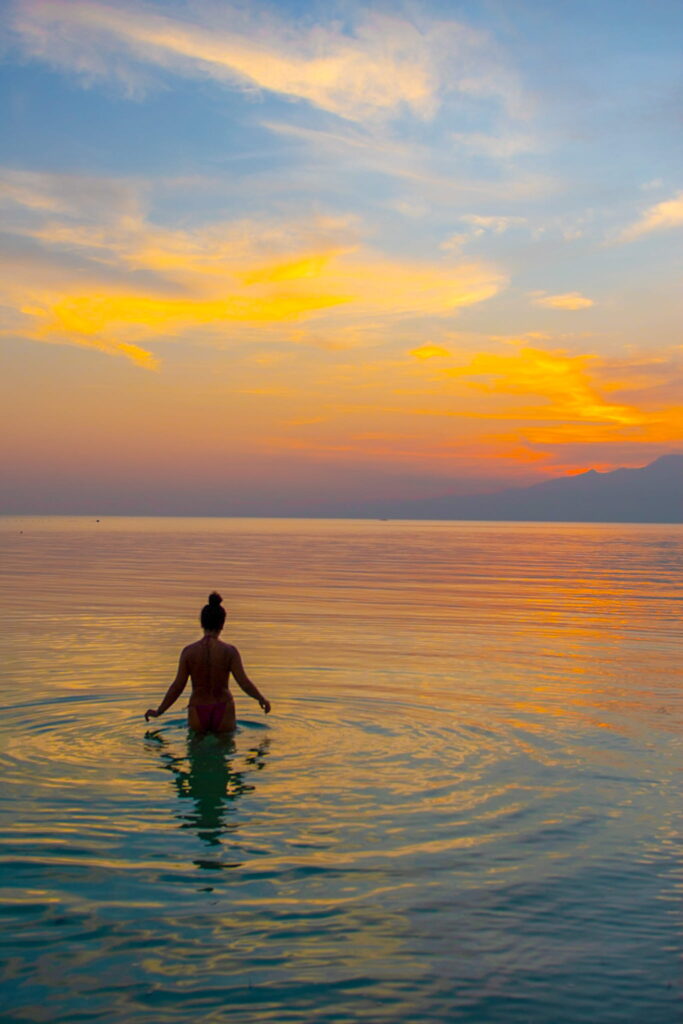
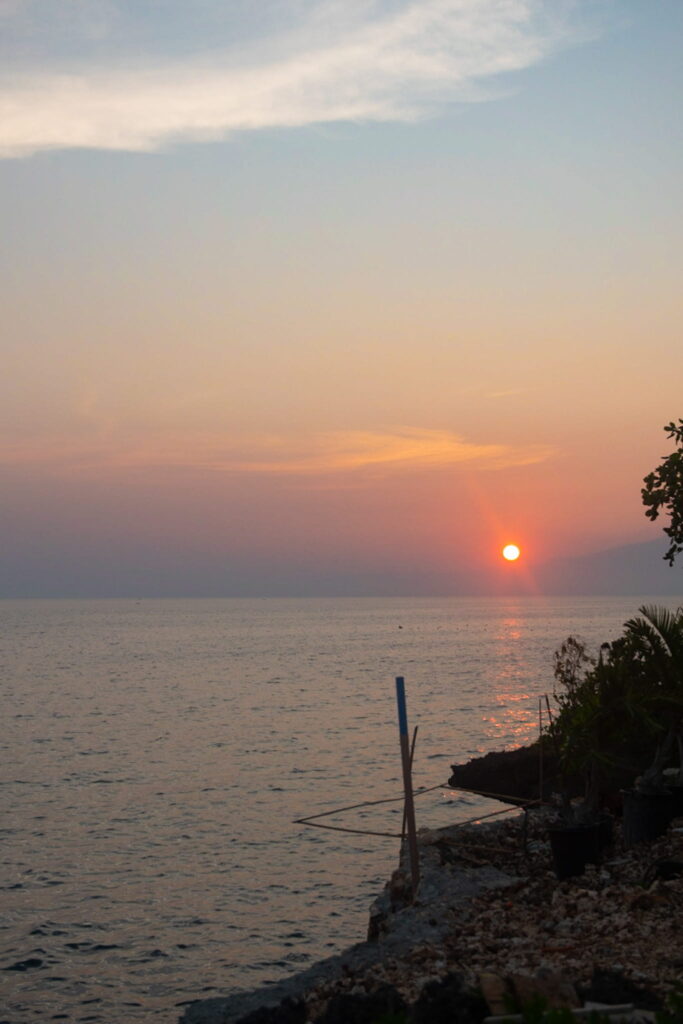
Paliton Beach
Paliton Beach is one of the most beautiful beaches I have visited on the whole island, and the perfect place to spend a lazy afternoon. I watched the sunset here, and it was absolutely stunning, the whole sky was colours of pink and orange, and the water was super still. I’d grab a coconut and perch up on the sand around 5:30 pm.
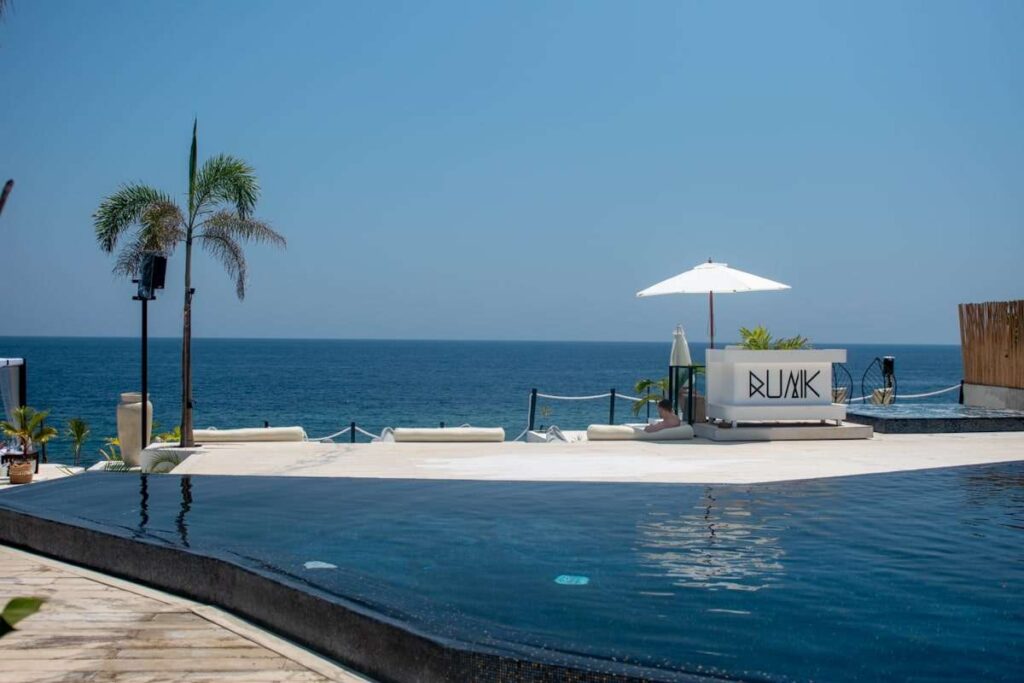
Runik Beach Bar
Runik Beach Bar was one of those places I stumbled across and ended up loving far more than I expected. If you fancy a day by the pool without the luxury price tag, this is the place to go.
I ordered the mango daiquiris, and they were honestly some of the best cocktails I’ve had anywhere in Southeast Asia (I may have had one or two too many). We arrived for lunch and somehow found ourselves still there at sunset (that should tell you everything you need to know).
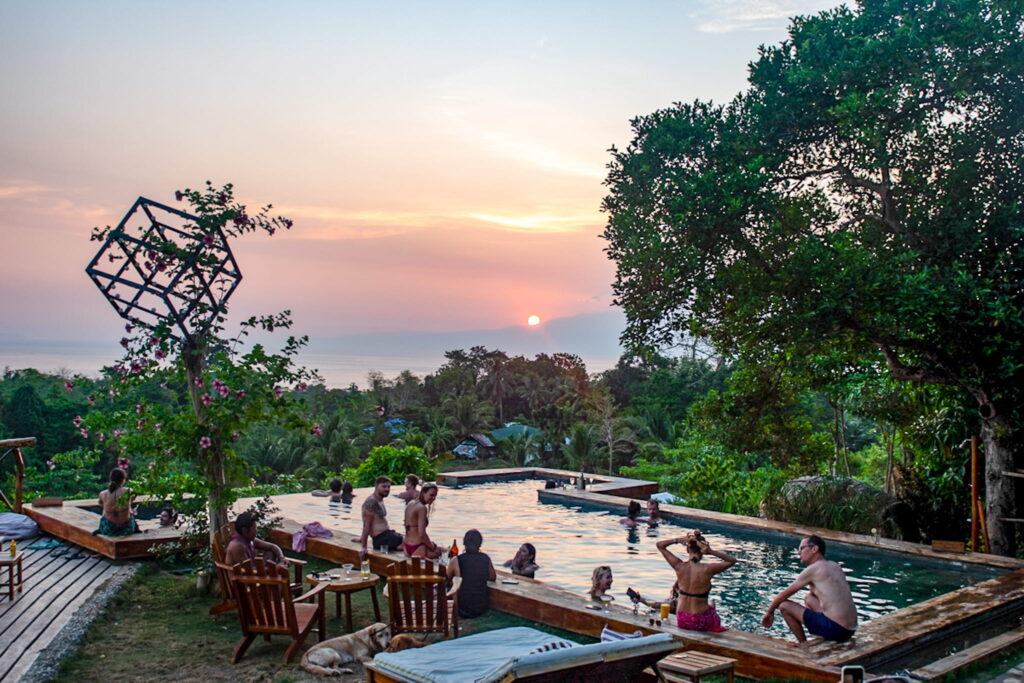
Nakabalo Resort
Nakabalo Resort was one of my absolute highlights in Siquijor, and somewhere I’d send every single person visiting the island (hence why it’s getting a special mention on this Philippines itinerary).
Located up in the hills, the infinity pool looks out over Siquijor’s entire coastline. Whilst it’s a hotel, non-guests are more than welcome to spend the day here, and I’d strongly recommend taking advantage of that.
The food and drinks from the on-site restaurant were delicious, and the sunsets I watched from that pool were genuinely second to none.
The best part? As the sun goes down, a DJ and saxophonist start playing in the background. The resort also had 2 golden retrievers onsite, and with the sunset, the music, the dogs, it was one of those travel moments that made me go “wow, I love my life”.
More things to do in Siquijor
Siquijor has so much more to offer beyond the highlights above. I’ve written a full, dedicated Siquijor travel guide, which I’d highly recommend reading before you visit, but here’s a quick overview of what else I think is worth adding to your list:
- Lugnason Falls — A quieter, less visited waterfall that’s well worth seeking out if you have the time
- Mountain of Peace — A peaceful hilltop shrine with panoramic views over the island
- Salagdoong Beach Cliff Jump — Jump off the famous red and white diving board into crystal clear water below
- Pitogo Cliff — A dramatic clifftop viewpoint well worth the short hike
- Tubod Beach and Marine Sanctuary — One of the best snorkelling spots on the island
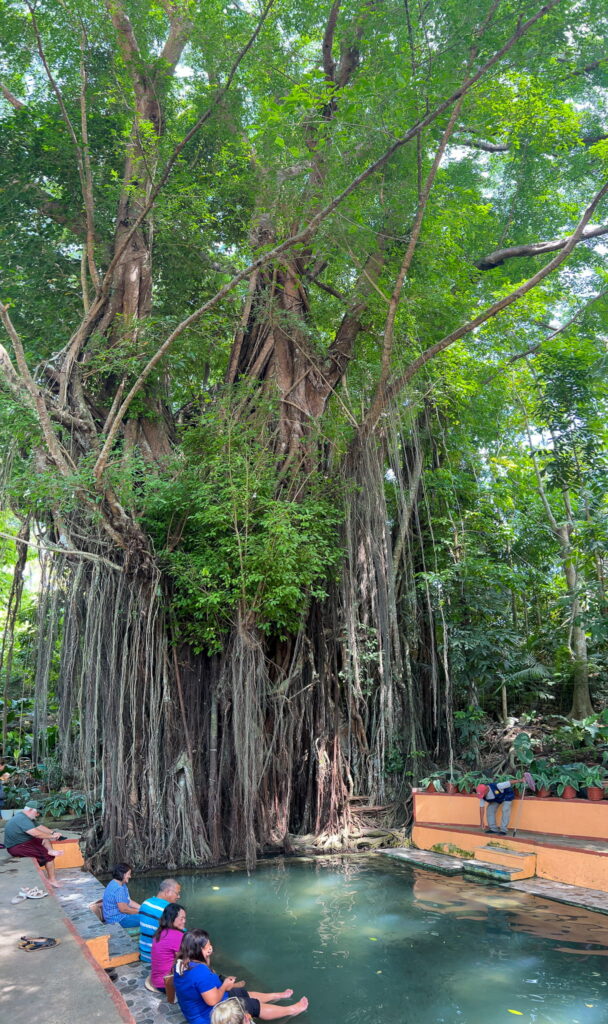
- The Old Balete Tree — A 400-year-old tree with a small fish spa at its base
- Live Music at Monkey Business — The best spot on the island for cold drinks and live music in a relaxed, open-air setting
Want More Time in the Philippines? Here Are My Bonus Island Recommendations
Ten days go fast in the Philippines, trust me, I know. If you have a little extra time up your sleeve or want to swap one of the stops on this itinerary for something different, here are three islands I’d personally recommend exploring.
The best part? They all sit neatly along the same travel route, so you won’t need to go out of your way to include them.
Option 1 — Port Barton, Palawan
Port Barton is a small, laid-back beach town on the island of Palawan that most travellers skip in favour of heading straight to El Nido.
If you want to include Port Barton, I’d recommend flying into Puerto Princesa Airport and catching a shuttle bus directly there before making your way up to El Nido afterwards. It adds a really lovely and relaxed start to your Philippines backpacking route.
Option 2 — Bohol
If you’re routing through Cebu on your way to or from Siquijor, Bohol is an absolute no-brainer addition to this Philippines island-hopping itinerary. Ferry routes from Cebu to Siquijor stop at Tagbilaran on the island of Bohol, making it incredibly easy to hop off and spend a couple of days exploring.
Bohol is home to the famous Chocolate Hills, one of the most unique landscapes in the entire Philippines, and is also one of the best places in the country to spot the incredibly cute Tarsier Monkey. I’d carve out at least two days here if you can.
Option 3 — Negros Island
If you’re taking the Dumaguete route to Siquijor (which is the route I’d recommend), why not spend a night or two on the island of Negros? Dumaguete sits on the eastern coast of Negros and makes for a really convenient stopover.
Negros is best known for its epic waterfalls, and whilst it has some beautiful beaches too, it’s the inland scenery that really sets it apart. It’s the kind of place that feels genuinely off the beaten track and rewards travellers who make the effort to explore it.
How to Book Transport Around the Philippines
Getting between islands in the Philippines is a big part of the adventure, but it can also be one of the most stressful parts of the planning process if you don’t know where to look.
These are the exact platforms I used to book transport on my Philippines island hopping itinerary, and I wouldn’t have gotten very far without them.
- Bookaway — My go-to for booking buses and shared shuttles. The interface is really easy to use, and you can compare routes and prices in one place. I used this constantly throughout the Philippines.
- 12Go Asia — Brilliant for booking ferries across the Philippines. I’d recommend cross-checking both Bookaway and 12Go Asia to make sure you’re getting the best price and most convenient route.
- Get Your Guide — Not just for activities — Get Your Guide is also great for booking day trips and transfers.
💡 Pro tip: I’d always recommend booking ferries and buses in advance during peak season (December–April). Routes between popular islands like El Nido and Coron fill up quickly, and the last thing you want is to be stranded waiting for the next available crossing!

Frequently Asked Questions About the Philippines Island Hopping Itinerary
Is 10 days enough time for the Philippines?
Ten days in the Philippines is absolutely enough time to get a brilliant taste of what this incredible country has to offer.
It won’t cover everything, but with the right itinerary, you can experience some of the most stunning landscapes, beaches, and culture in Southeast Asia.
What is the best time to visit the Philippines for island hopping?
The best time to visit the Philippines for island hopping is between November and May during the dry season. I’d personally recommend travelling between January and April for the most reliable weather and calmest seas.
Try to avoid June through October if possible, as this falls within typhoon season and can make island hopping between destinations difficult and sometimes dangerous.
Is the Philippines safe for solo female travellers?
In my experience, the Philippines is a very welcoming and safe destination for solo female travellers.
The Filipino people are some of the friendliest I’ve encountered anywhere in my travels, and I never once felt uncomfortable or unsafe throughout my trips.
As with any destination, standard common sense applies: be aware of your surroundings, avoid walking alone late at night in unfamiliar areas, and trust your instincts. The islands on this itinerary, particularly Siquijor and Darocotan, are very safe and relaxed environments.
How do I get around the Philippines on a budget?
The Philippines is a very budget-friendly destination once you’re on the ground. For getting between islands, I’d recommend using Bookaway and 12Go Asia to compare ferry and shuttle prices.
Within islands, renting a moped is by far the cheapest and most fun way to get around and one of the best ways to explore at your own pace. Expect to pay around $8–$12 per day for a moped rental.
Do I need a visa to visit the Philippines?
Most nationalities, including UK, US, Australian, and EU passport holders, can enter the Philippines visa-free for up to 30 days.
This is more than enough time for this 10-day itinerary. I’d always recommend double-checking the latest entry requirements for your specific nationality before you travel, as these can change.
The official Philippines Bureau of Immigration website is the best place to verify this.
What is the best island to visit in the Philippines for first-timers?
If you’re visiting the Philippines for the first time, I’d recommend starting with El Nido on the island of Palawan. It’s well connected, has a great range of accommodation for all budgets, and the island hopping tours here are some of the best in the country.
If you have more time, adding Coron and Siquijor to your itinerary will give you a really well-rounded experience of what the Philippines has to offer.
How much does a 10-day Philippines trip cost?
The Philippines is a very affordable destination for most travellers. As a rough guide, I’d budget somewhere between $800–$1,500 for a 10-day trip, depending on your travel style (not including your international flights).
Happy Hopping
And that’s a wrap on my ultimate 10-day Philippines island hopping itinerary! I hope this guide has taken some of the overwhelm out of planning your trip and given you a clear, actionable route to follow.
The Philippines genuinely has some of the most beautiful landscapes I’ve ever seen anywhere in the world, and this itinerary only scratches the surface.
Whether you end up falling in love with the stillness of Darocotan, the dramatic lagoons of El Nido, the raw beauty of Coron, or the magical charm of Siquijor, as I did, I promise you won’t be disappointed.
If you have any questions about this Philippines backpacking route at all, drop them in the comments below, and I’ll do my best to help.
Before you go, here are a few helpful resources:
- Ready to book? Head to Skyscanner to find the best flight deals to the Philippines.
- Planning your Philippines trip? Save this post to Pinterest (below) so you can find it again when you need it!
- Want more Philippines inspiration? Check out all of my Philippines travel guides here.
- Visiting Siquijor? Don’t miss my complete guide to the best places to visit in Siquijor.
- Staying at Isla Experience? Read my full honest review before you book.
- Keen to know more about Darocotan Island? Check out my guide to the island here.


Hi Christina! Your blog on the Philippines is SUPER helpful as I am trying to map out my own trip for April. Your last stop was Siquijor, right? How did you travel back to your home destination, did you fly from Manila? Thanks!
Hey my love!
So Glad you’ve found it all helpful. So I actually flew out from Cebu Mactan Airport to Singapore as I was on a larger asia trip but there are quite a few international flight options from Cebu so worth taking a look x